How to Do a Easy Back Handspring
This is generic information and not to be confused with advice. Speak to a professional for all your health needs and seek their counsel. Children need to be under adult supervision at all times. We disclaim all liability for any physical harm resulting from the information on this website. For more info see our disclaimer and privacy policy.
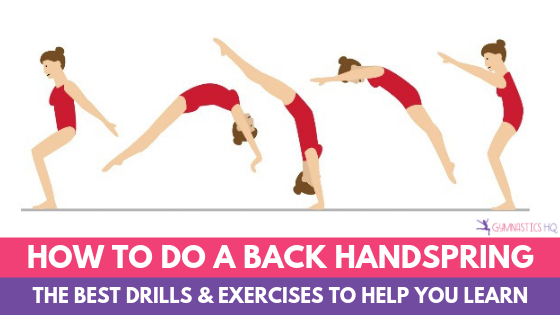
A back handspring is a gymnastics skill that is a big milestone in a gymnast's progression. And when a gymnast is trying to learn how to do a back handspring, she really wants to get it so bad. It can be a hard skill to learn because it is unlike any skill a gymnast has learned before. And since a back handspring requires a gymnast to push and jump backwards it can also create mental blocks. While it can be a hard skill to learn, it's very exciting and fun when you finally master your back handspring. Here are the muscles you need, the drills you need to know how to do and the steps to learning and mastering your back handspring.
But first, make sure you download the back handspring workout below!
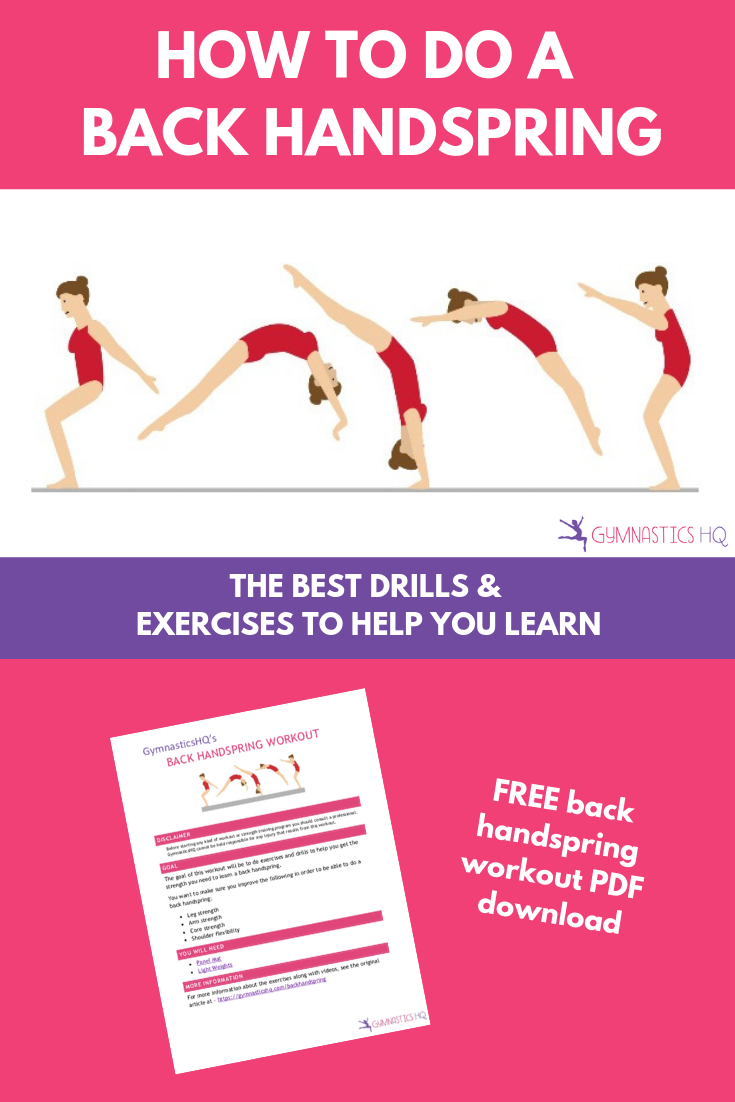
How to Do a Back Handspring Step by Step
*Please note: You should only be attempting a back handspring with proper spotting from an adult. Do NOT attempt a back handspring on your own or you could risk serious injury.
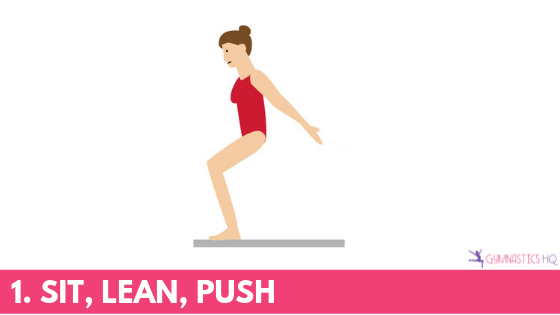
1. Sit, Lean, Push
This is where you are using your leg strength to push off the floor.
2. Tight Arch
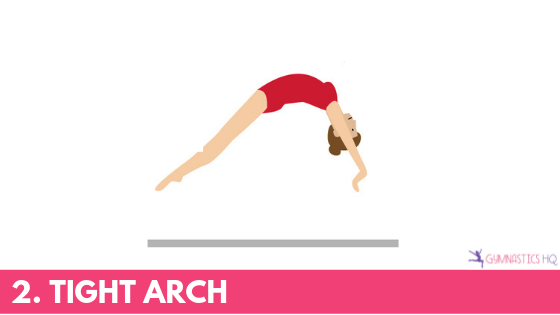
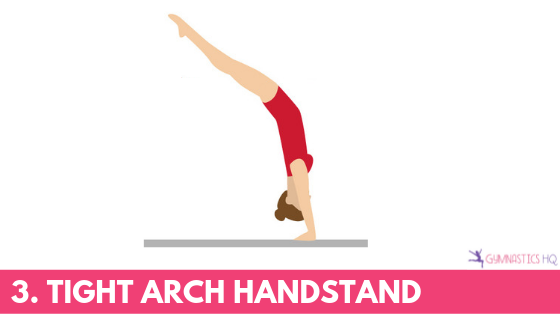
3. Tight arch handstand
This is where you are using your arm strength to push off the floor, along with your core strength to pull your legs over your head fast
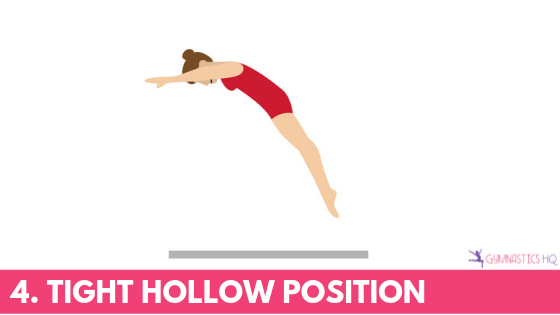
4. Tight hollow position
You have pushed off the ground and snapped from a tight arch to a high hollow position.
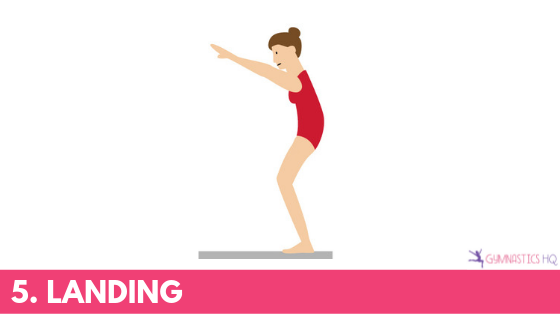
5. Landing
If you are doing a standing back handspring you want to land with your feet directly under your hips. If you are doing a back handspring in a connection, you want to land with your feet in front of your hips.
Muscles you need for a Back handspring:
- Legs:You need strong legs, this includes your quads, glutes and hamstrings, in order to do a back handspring. Your leg muscles help you push off the gr
 ound in the beginning of the back handspring onto your hands in a handstand position.
 - Arms and Shoulders:You need to have strong arms and shoulders for the middle part of the back handspring. You will use your shoulder and arm muscles to push against the floor in the handstand position and during the back handspring to "snap" and land on your feet with your chest up.
- Core: Your core stomach muscles help you maintain a tight body position throughout the back handspring.
Exercises you can do at Home:
These are exercises you can do to strengthen the muscles you need to be able to do a back handspring. Most of the time the most important thing you can do at home to help yourself learn a new skill, is to strengthen the muscles you need.
- Wall Sits: Put your back to a wall, and slide your bottom down as you move your feet away from the wall, to put your body in the shape of a chair. Your knees should be bent, and your thighs and calves should be perpendicular to each other. Try to hold this for 30 seconds to 1 minute at a time. This exercise is good for strengthening your legs — your quads and hamstrings.
- Planks:Get into a push-up position, making sure you squeeze your legs together tightly and are squeezing your core. Make sure your shoulders are over your wrists. You can either hold your plank position on your hands, or you can lower yourself to your forearms. Keep your head neutral. Try to hold your plank position for 30 seconds to 1 minute at a time. Planks help to strengthen your abs, back and shoulders.
- Hollow Holds: A hollow hold is very similar to a plank except your arms are farther in front of you. To do a hollow hold, get into a push-up position. Then move your feet and arms farther away until you are in a tight hollow position with your arms tucked tightly between your ears. Your legs should be straight, and your bottom squeezed. You can see this demonstrated at the beginning of the video below.
- Squats:To do a proper squat, stand with your feet hip-width apart with your arms by your side. Lower yourself down as far as you can by pushing your hips back and moving your body weight on to your heels. Let your arms come up to help you balance. You don't want your knees to go far past your ankles. Your toes should be pointed forwards. Then stand up slowly again. Try to do them in sets of 10. Squats help to strengthen your quads, glutes and hamstrings.
- Squat Jumps: To do a squat jump, stand with you feet hip-width apart. Lower yourself into a squat, and then push through your ankles and toes to jump up. Land your jump and slowly lower your body down into a squat again.
- Sumo Squats:Sumo squats are similar to regular squats except your legs are farther apart and your toes are pointed slightly out. Stand with your feet a little larger than shoulder-width apart with your toes pointed at a 45° angle. As with a regular squat, lower your body as far as you can by pushing your hips back and bending your knees. The weight of your body should be on your heels. Then stand back up again slowly. Sumo squats strengthen your hamstrings, quads and glutes.
- Pull-Ups: Pull-ups help to strengthen your upper-body, your arms and shoulders. You can do both pull-ups and chin-ups with a pull-up bar for arm strength. For pull-ups you hold the bar with your fingers facing away from your body, and pull your chin over the bar. For chin-ups you hold the bar with your fingers facing towards your body.
- Arch/Hollows on a Pull-Up Bar:You can work your core muscles, and also practice the shape from the middle of the back handspring, when you do arch/hollow holds on a pull-up bar. In the middle of the back handspring your body goes from a slight arch position getting into the handstand, to a slight hollow position as you snap down. To do arch/hollows on a pull-up bar, hang from the bar in a slightly arched position. Make sure you are squeezing your legs, butt and core. Then move your body to a slight hollow position, making sure you are still squeezing your legs, butt and core. Repeat this. Try to do 10 reps at a time. You can see this exercise in the video below.
- Wall Angels: Watch this video. Sit with your back against a wall and your arms raised above your head. Lower your arms to the side, then raise them again. Repeat 10x.
- Leg Lifts: Here is a video. Lay on your back with your legs flat against the floor. Raise your legs so they are straight over your waist. With your arms behind your head, lower your legs to the floor while pushing your lower back into the floor (you don't want it to arch off the floor). Lower your legs as far as you can without your back arching off the floor, and then raise them again. Repeat. This exercise mimics the movement of you bringing your legs over your head in your back handspring.
Back Handspring Prep Workout

Back Handspring Drills you should be able to do at the gym:
These are back handspring drills you should be able to do before you attempt to do a back handspring with a spot. These are drills you need to do at a gym because they require equipment, mats and a spot.
- Handstand Snap-Down Drill: The handstand snap down drill is the second half of the back handspring. Do a handstand on a mat, and then bring your feet down fast to land with your chest up. The goal is to push through your shoulders and get your chest up fast.
- Sit, Fall, Push onto Mat Stack: The push-backs drill is the second part of the back handspring. The goal is to explode backwards to a tight body position on a mat stack by pushing through your legs. One of the main reasons for the drill is to get comfortable with the feeling of sitting and leaning back. The other point is to learn to push hard through your legs.
- Back handspring over the Barrel: The goal of the back handspring over the barrel drill is to help you learn the mechanics of the back handspring. It's to help the gymnast practice the steps — sit, lean, push back through the legs onto your hands in a handstand position, and then snap your legs down to a stand.
- Back handspring on the Trampoline: You should be able to do a back handspring in a tight body position well on the trampoline before moving it to the floor.
I've embedded a video that has excellent back handspring drills below. Do not attempt any of the drills in this video that require a spot, or those for which you don't have the proper equipment.
Back Handspring Drills you can do at Home:
These are back handspring drills you can do at home to help improve the skills you need for a back handspring.
- Handstand Against the Wall: In order to be able to do a good back handspring, you should be able to hold a handstand against the wall in a tight body position, with arms and legs straight and tight and your bottom squeezed, for at least a minute.
- Bridges: You can practice bridges at home. Make sure you push back and try to get your legs straight in the bridge. You should be feel the stretch in your shoulders. You need shoulder flexibility for a back handspring.
Once you have strengthened the muscles you need for a back handspring, and learned how to do the back handspring drills above, then you can start trying to do a back handspring with a spot. Do not attempt a back handspring by yourself without a spot. You need to be in a gym with a trained coach. They can spot your back handsprings, until they are comfortable with you being able to do them by yourself.
Tools for Learning a Back Handspring
Here are some of the tools and gymnastics equipment mentioned above that help you learn how to do a back handspring.
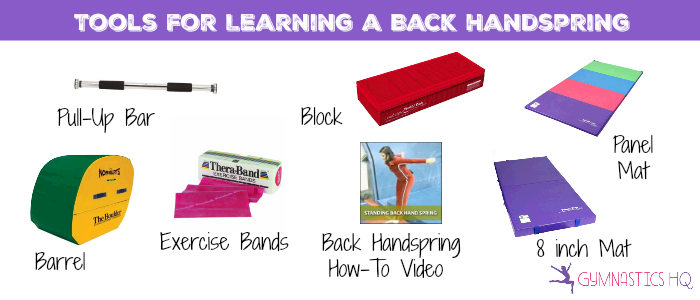
Pull-Up Bar: A Pull-Up bar is useful for some of the strength exercises listed above. You can also use a pull-up bar to do a couple of the drills in the video.
Block: A block is used in the video, and it can also be used for the handstand snap-down drill mentioned above.
Panel Mat: A folded up panel mat can be used for the handstand snap-down drill.
Barrel: Most gymnasts learn the steps to a back handspring with a barrel. Don't attempt this without being spotted first!
Exercise Bands: Exercise bands can be used for many strength exercises, and are also used for some drills in the video.
Back Handspring How-To Video: This Back Handspring tutorial video is by Dominique Moceanu, an Olympic Gold medalist. You can download the video to watch immediately.
8- Inch Mat: An 8-inch mat is shown in the video for some of the back handspring drills. You should always learn new gymnastics skills on mats before attempting them on the floor.
We've listed the steps you need to take and drills you need to be able to do in order to learn a back handspring. But it is still a hard skill and will take time to learn. You will need to do it many times with a spot, before you attempt it by yourself. Once you have learned your back handspring, though, we know you'll feel a sense of accomplishment and it will be worth it! Good Luck 🙂
Source: https://gymnasticshq.com/backhandspring/
0 Response to "How to Do a Easy Back Handspring"
Post a Comment